January 2017
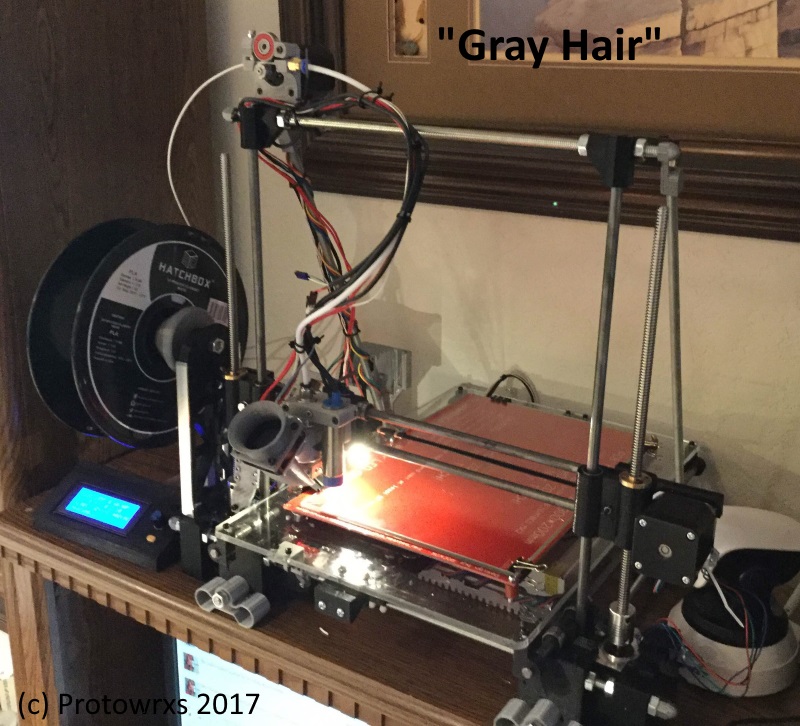
After getting Mr. Wallace out of the closet and actually getting it printing, I’ve been rather deeply interested in 3D printing again. I still had some spare parts and we were planning on building out my son a Wallace based printer for his college needs so I started assembling the basic parts. My goals were to use the improvements I made to Mr. Wallace and expand that a bit by adding a direct feed extruder and a bowden setup to lower the X carriage weight. Potentially this would drop the wobblies from the extra mass moving around out there and just looks a bit cleaner anyhow. I also wanted to test and use one of the new inductive bed sensors I picked up and try out auto bed leveling.
Once Mr. Wallace was doing well, I really didn’t want to tear him all up to try out these new things so I printed out the parts needed and threw Gray Hair together. The name isn’t anything special, just reminded me of that with the black and silver trimmed out colors… and when I look in the mirror daily.
Why I Like the Wallace
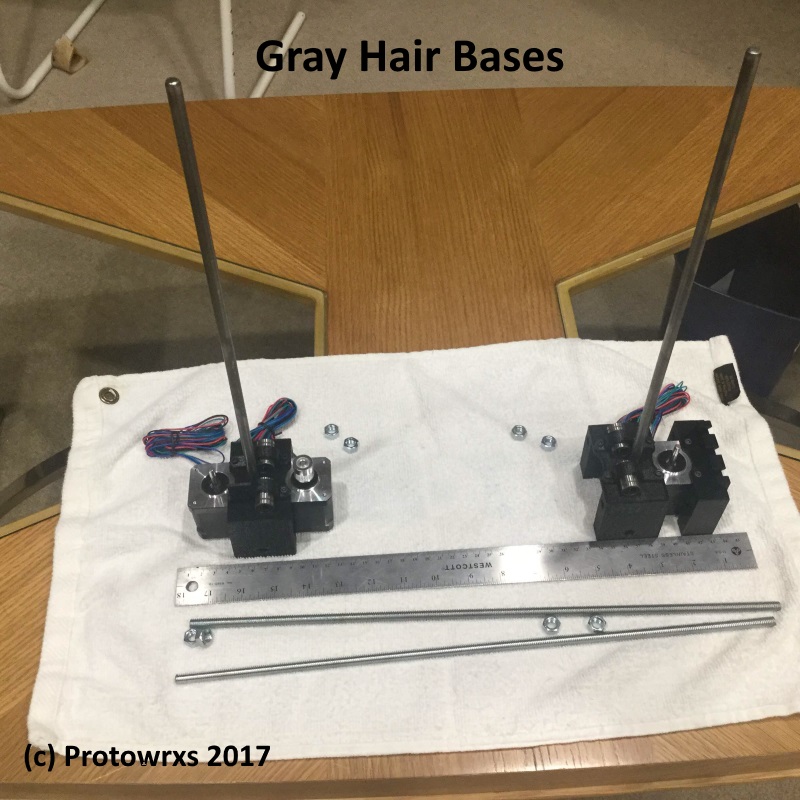
As noted in the Mr. Wallace post, I really like the Wallace design. Easy to understand, simply to put together, AND easy to expand all the axis as desired for the most part. At first I tried a normal 200×200 heat bed but I built the core base to handle a 200×300 as that was a long term desire. After burning up a RAMPS connector and a MOSFET with the smaller bed (obviously something screwed up there) I put the longer bed on it early which is fine. But again, it’s very easy to open up any axis to fit whatever bed you can come up with on the Wallace. I know there are some limits in regard to the Y being too long and the Z too wobbly but it’s a very nice simply design by “whosawhatsis”. The pic shows how simple the base is on this design with simple threaded and smooth rod connections.
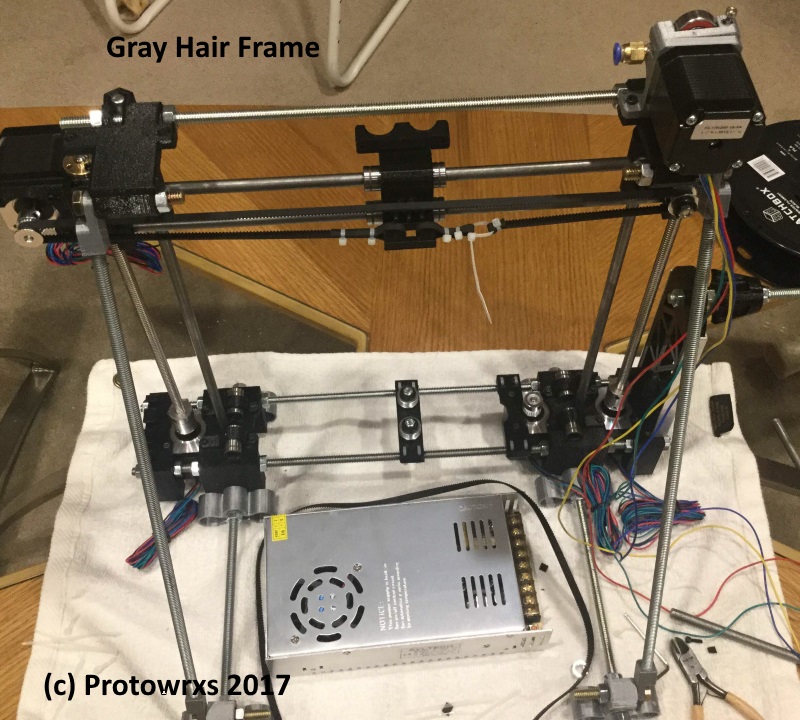
After a very short time you can have the frame together. Key is getting your X width correct so you can get full travel on your 200mm bed. I missed that slightly based on my setup but I’m at 190 so close enough. With mechanics done adding the rest is pretty straight forward as well. No magic or hard to measure, square or calculate areas for the most part.
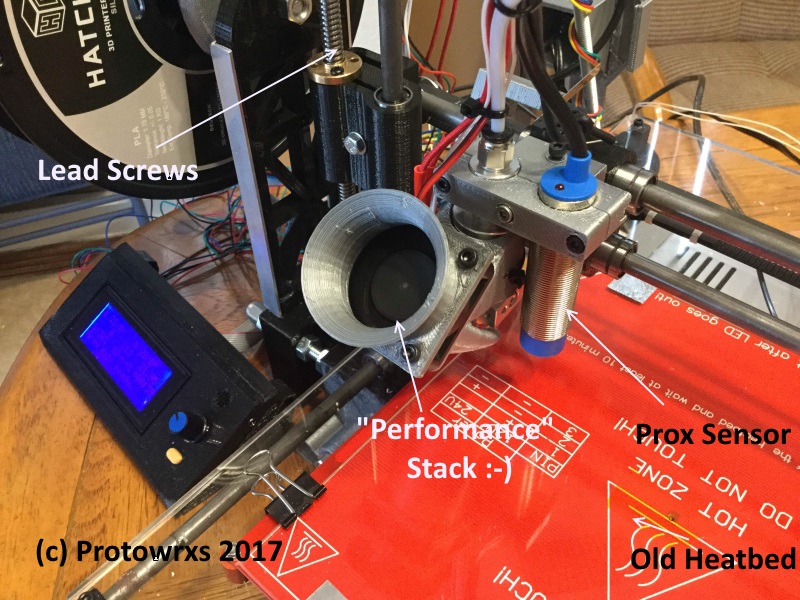
Gray is a bit different than Mr. Wallace as noted above in that it uses a bowden extruder setup as well as the standard vertical stacked X carriage arrangement. It also has a LJ18A3-8-Z/BX inductive sensor for the Z axis which is also used for auto bed leveling features. Right now I am using small sections of aluminum tape for the leveling and Z homing sensing but the inductive sensors appear to work through the glass to the heat board. I will have to change things around at some point and see if it will be consistent enough to use all the time. With Z Safe Homing set there shouldn’t be any issues of crashing the heat bed since Marlin will use the spot you set as your safe homing location.
The bowden setup lowers the hot end overall mass which should allow for faster print speeds and smoother overall prints. We will see however. Additionally the top Z clamps I modified to hold the backbone support, also provides for the bowden extruder and can also hold another extruder on the other side when I want to give dual extrusion a try someday. For now I’m running a combo cold end fan / part cooler fan which seems to be working fine. It may be best in the long run to have a different fan for parts cooling however to allow the firmware to better control when parts cooling may be needed. That would just add more mass to the X carriage however too so it’s all a balance.
Sample Prints
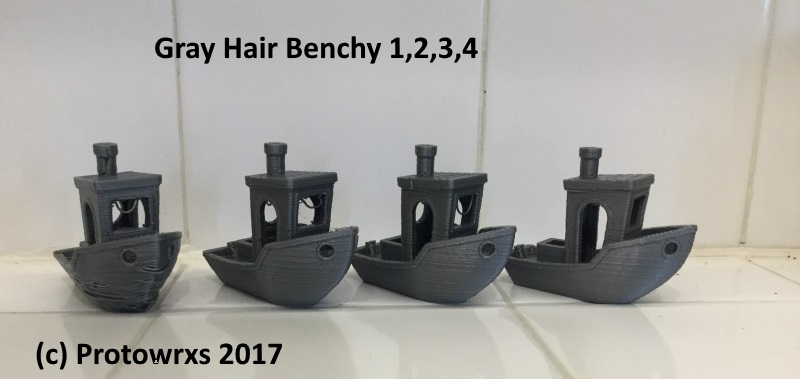
Here are a few sample prints from Gray Hair. The 3D Benchy boats go from the actual 2nd print on the printer without any part cooling and default settings through print #4 that cleaned up most of the overall issues.
Next is the final benchy using a .1mm layer. Still a few oddities that are likely due to parts cooling control or hot end temp drift so more work to do but quite acceptable.
