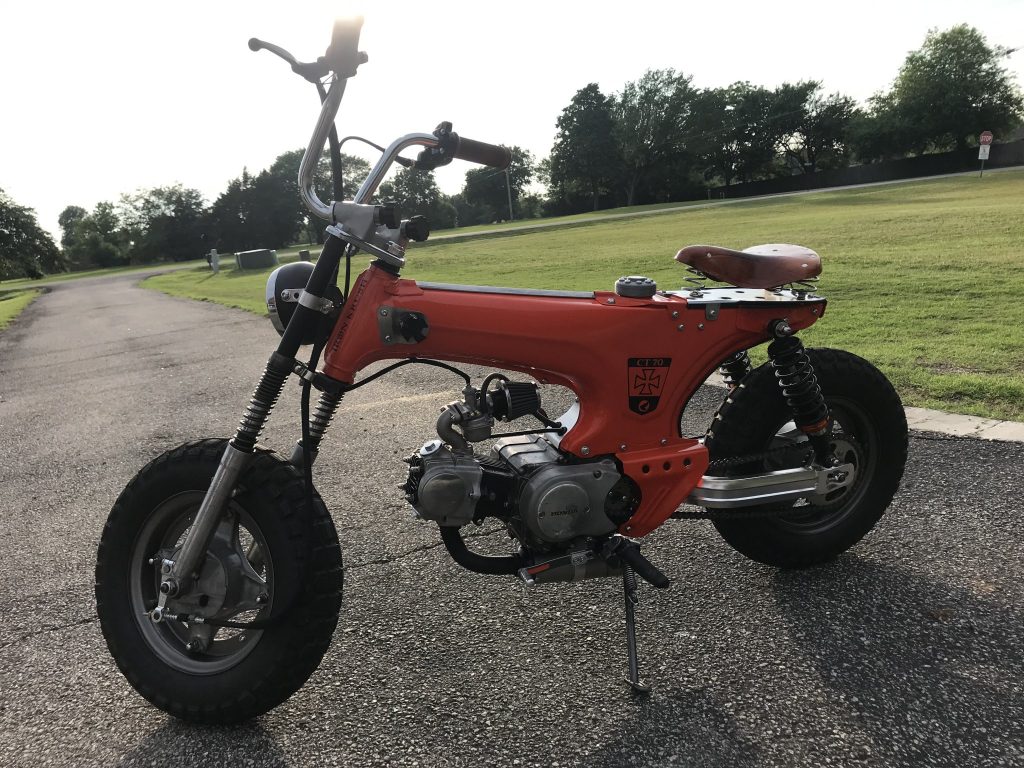
Final Update 2023-05
The Iron Krush bike is basically complete at this time. Several design changes were made along the way from any process pages below, including the tail light and engine internals.
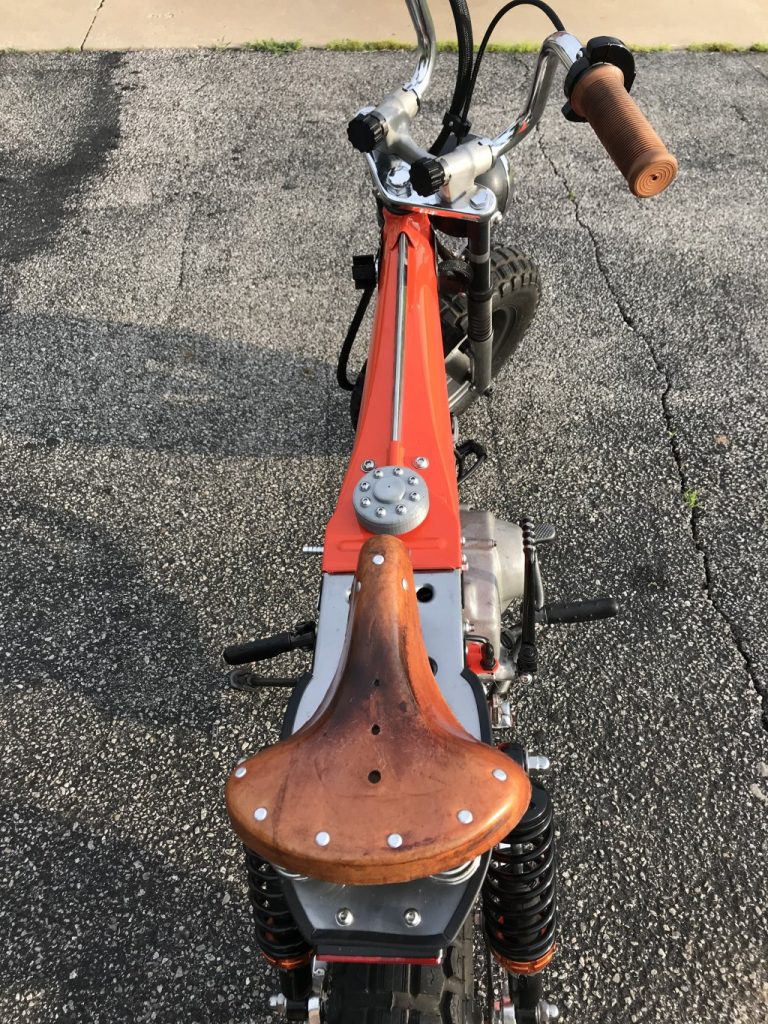
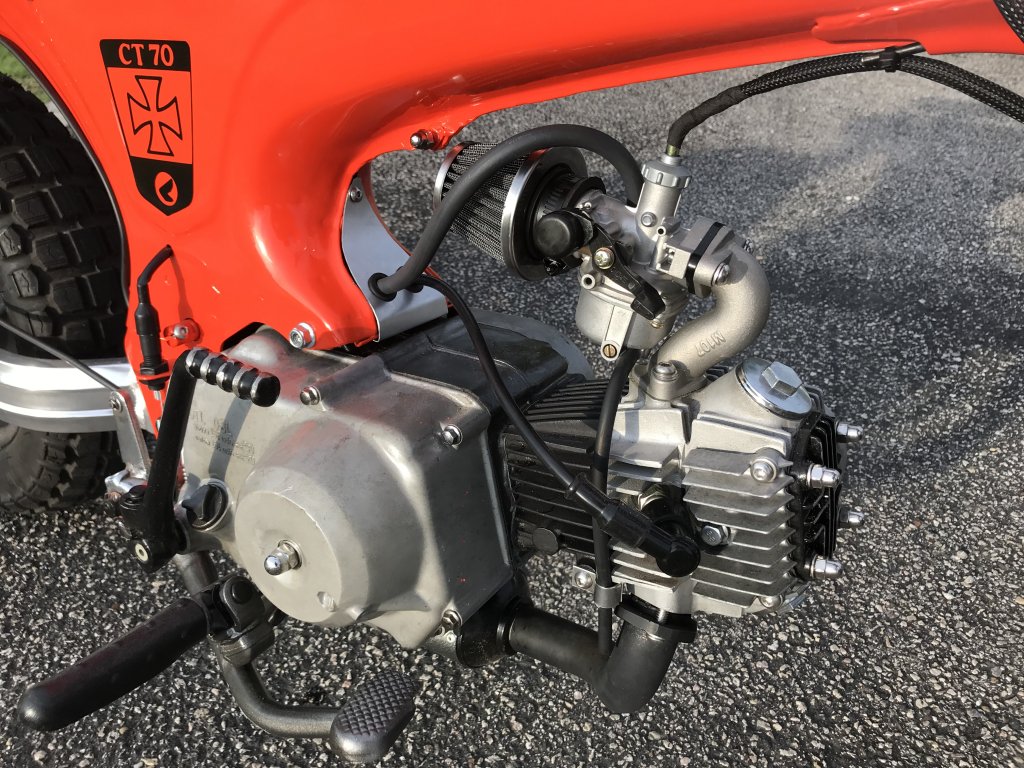
The bike is now sporting a vintage 80cc big bore kit, a vintage performance camshaft, inline intake, and an under slung 1.25″ exhaust system. The 3d printed gas cap tops off the tank.
The following pics and captions describe the end results.

Updates below:
2020-12-02 – Seat and Taillight Design
2020-12-02 – Seat / Saddle Mount Design
2020-12-03 – Front Fork Update
2020-12-04 – Rear shocks, engine cover, etc
2022-08-30 – Blown Apart for Paint Trip
2017-07 (or close)
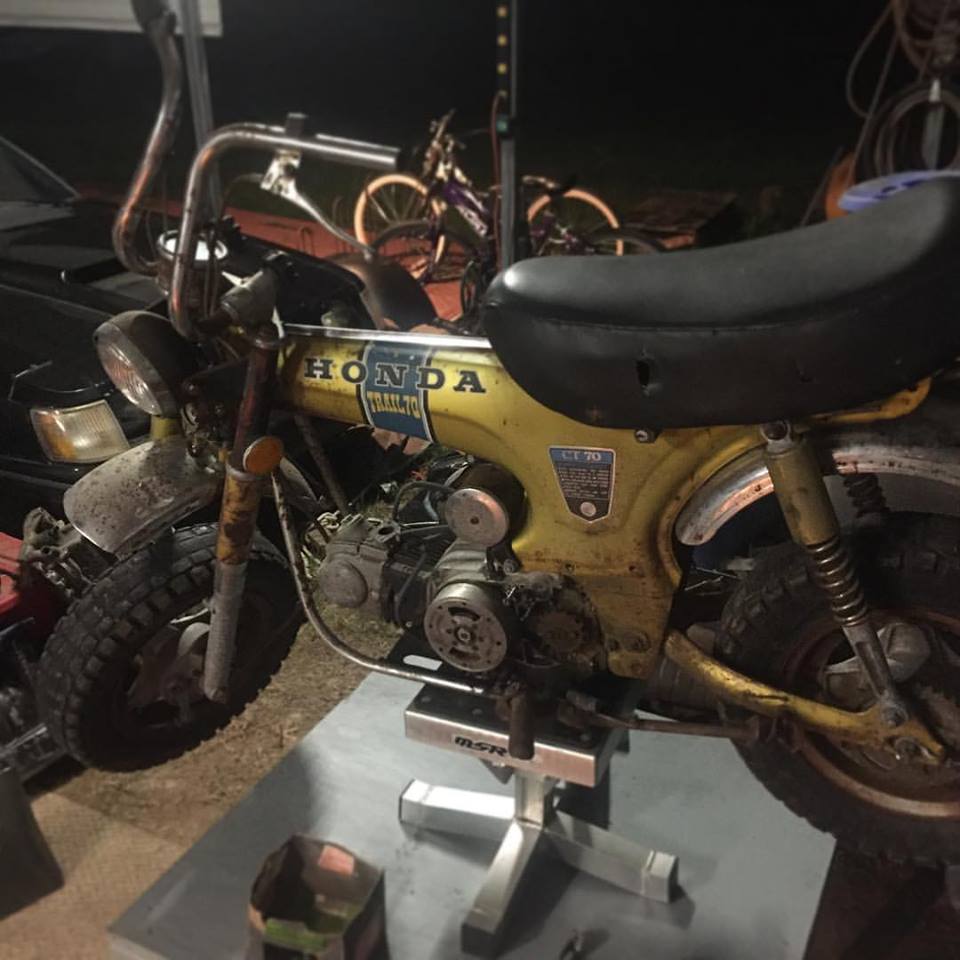
I always wanted a Honda Trail 70, or a CT70 as they are called. Ran across this one in the middle of 2017 for a couple hundred bucks and thought it was time to give one a try. It’s was pretty beat up. Engine locked up, rear brake locked up, no carb, and lots of rust and bends. Seemed like good bones though.
2020-12-02 – Seat and Taillight Design
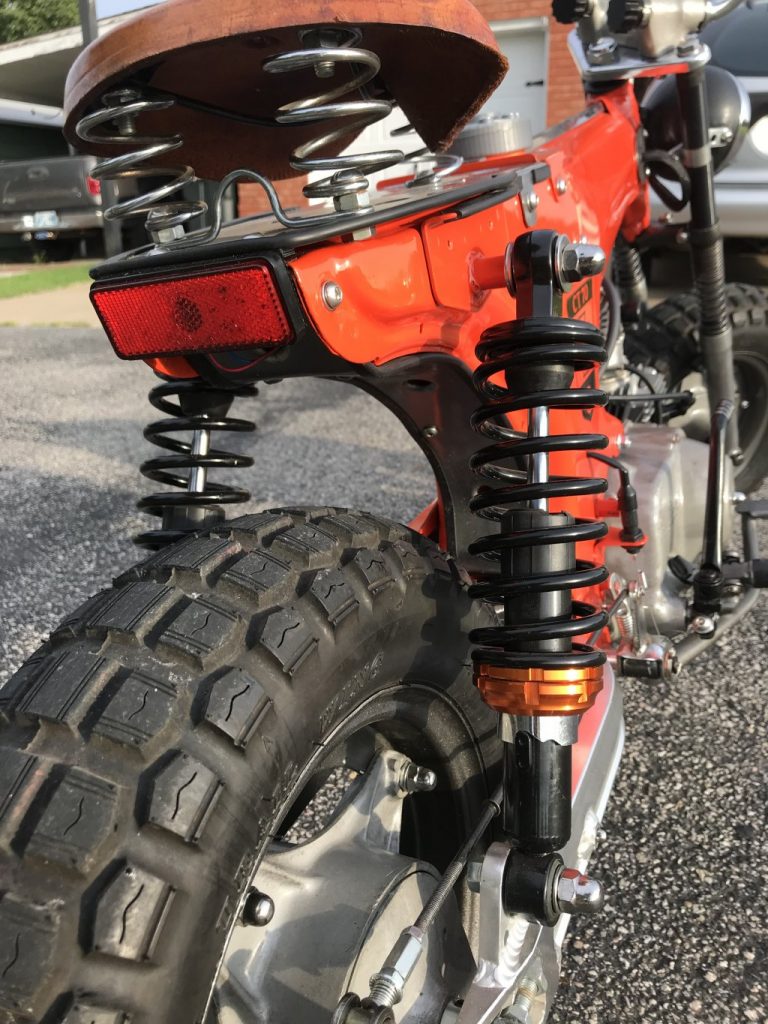
After seeing a post on the CT Modders Facebook group about taillights, I decided to design the taillight I was thinking about using the 3/4″ LED marker lights. After a short time in TinkerCAD I came up with below. It’s been revised a few times but fits pretty nicely.
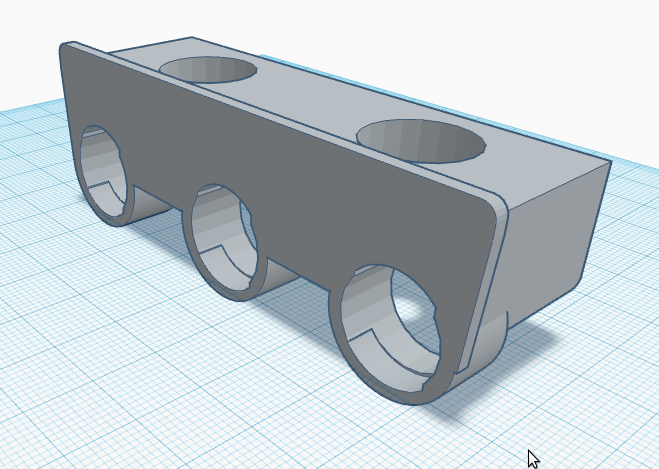
It uses some 3/4″ LED marker lights that key into the slots. The cups on the top go around the nuts normally used for the tail light bracket from the top.
Mounted on the bike and printed in black it looks good to me overall. However, I revised it a bit more and added an upper lip, changed the LED hole to properly key the lights in with some slots, and ended up with this.
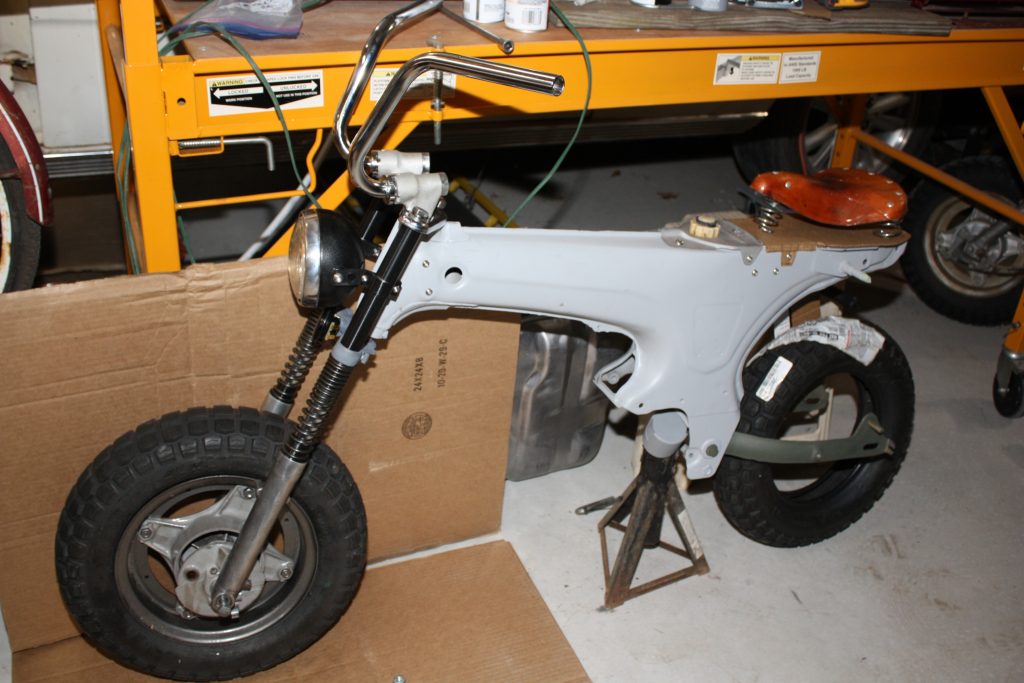
2020-12-02 Seat / Saddle Ideas
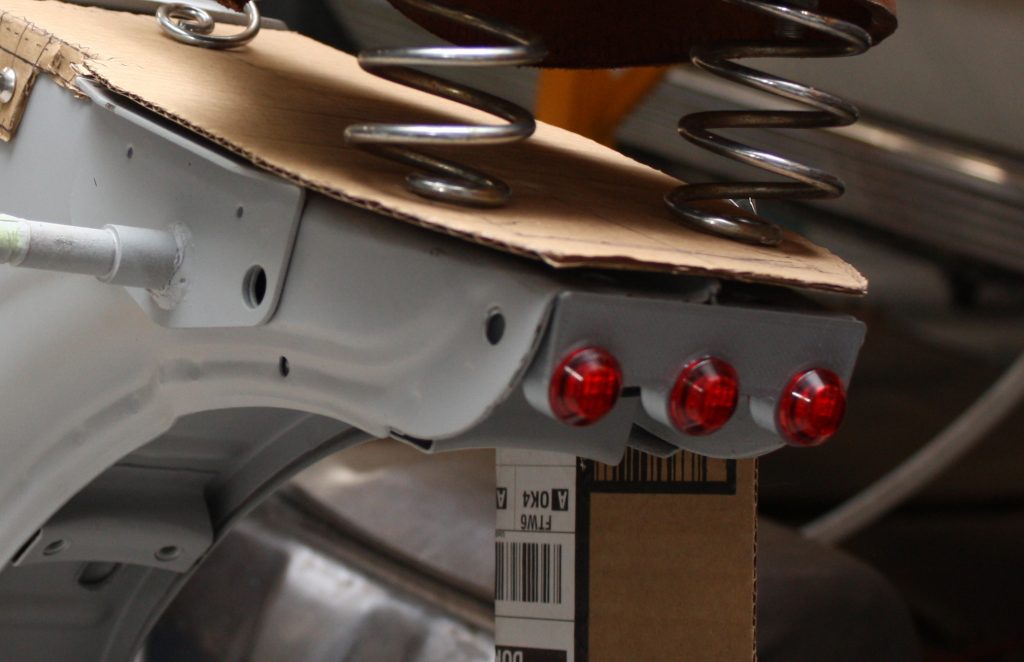
While working on the tail light concept, I wanted to start thinking about seats. I had two seat pans, one off this and the other off the bent K0, but both are total junk, bent and rusted badly. A thread in the CT Modders group about seats helped me to think outside the box a bit. There were some with skate board seat bases so I looked at the old skate board on the wall. While looking at the board, I saw this old bike saddle that was also hanging on the wall waiting to be used and thought it may actually work.
Breaking out some cardboard to hold it in place, I started cutting away for a template to mount the seat. I was ribbed a bit about my “CAD” design (aka Cardboard Aided Design), but that is the best way to quickly get a layout hands down.
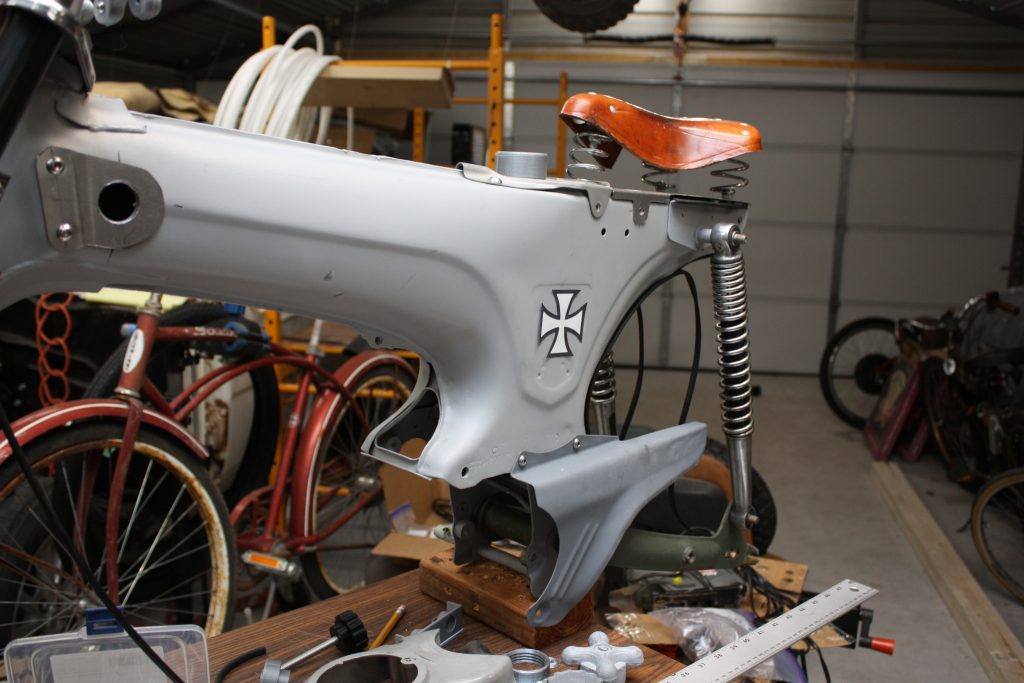
After fine tuning the CAD design, I cut and bent up some metal for it and poked some dimples in it for cuter looks. It’s now a functional seat. Some online were concerned it would be “wobbly as sh*t” mounted like that. It’s not. Strong springs and tripod based is just as stable as it would be on a bicycle.
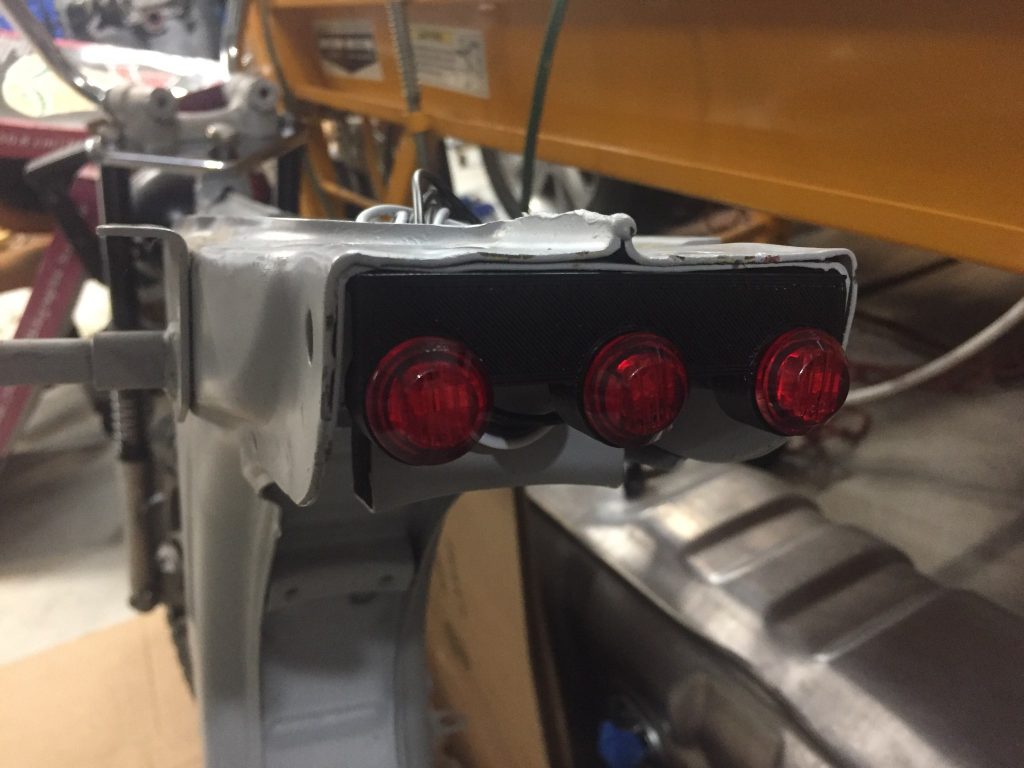
Looking from the back, it compliments the taillight in my opinion. I have another version of the taillight to try that has a bigger lip and covers the gap between it and the seat mount. Will have to see how it looks.
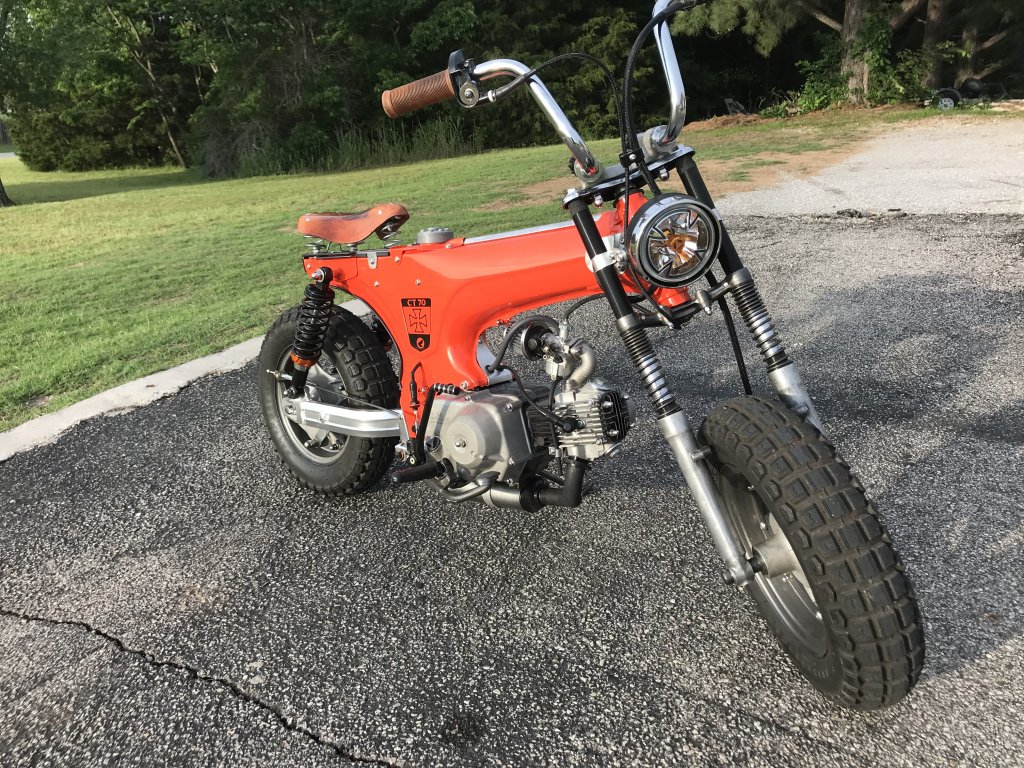
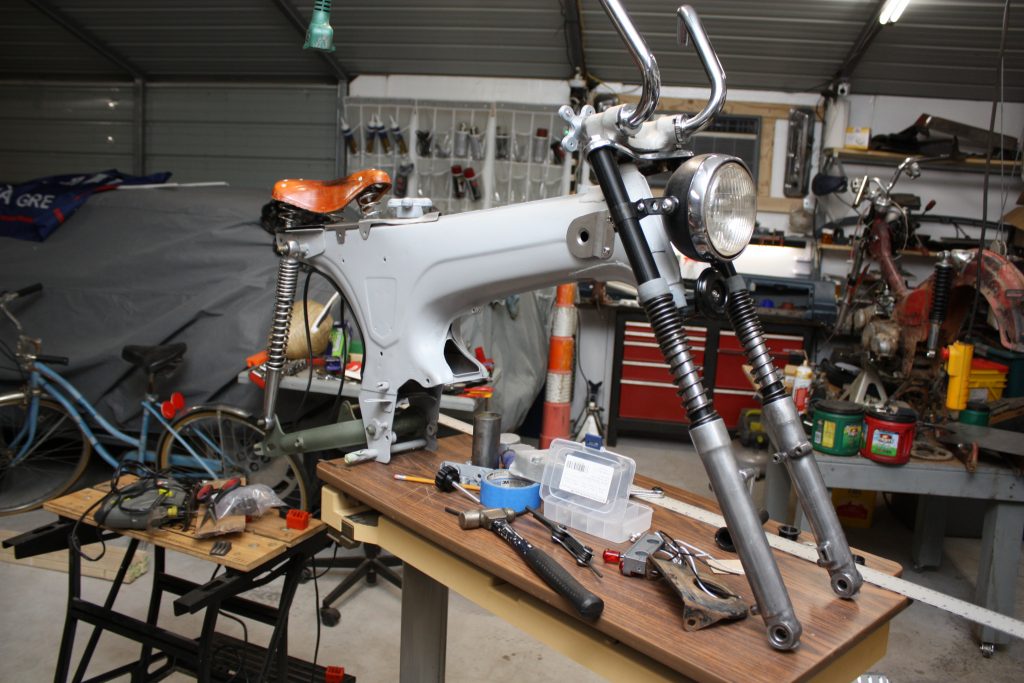
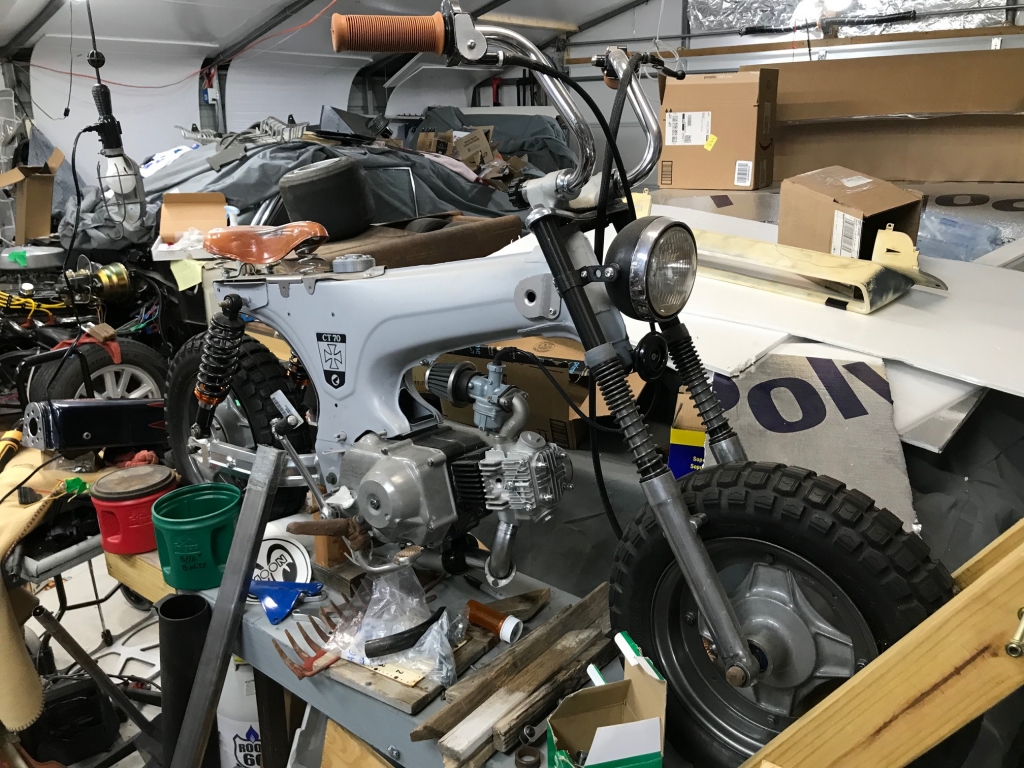
2020-12-04 Fork Update
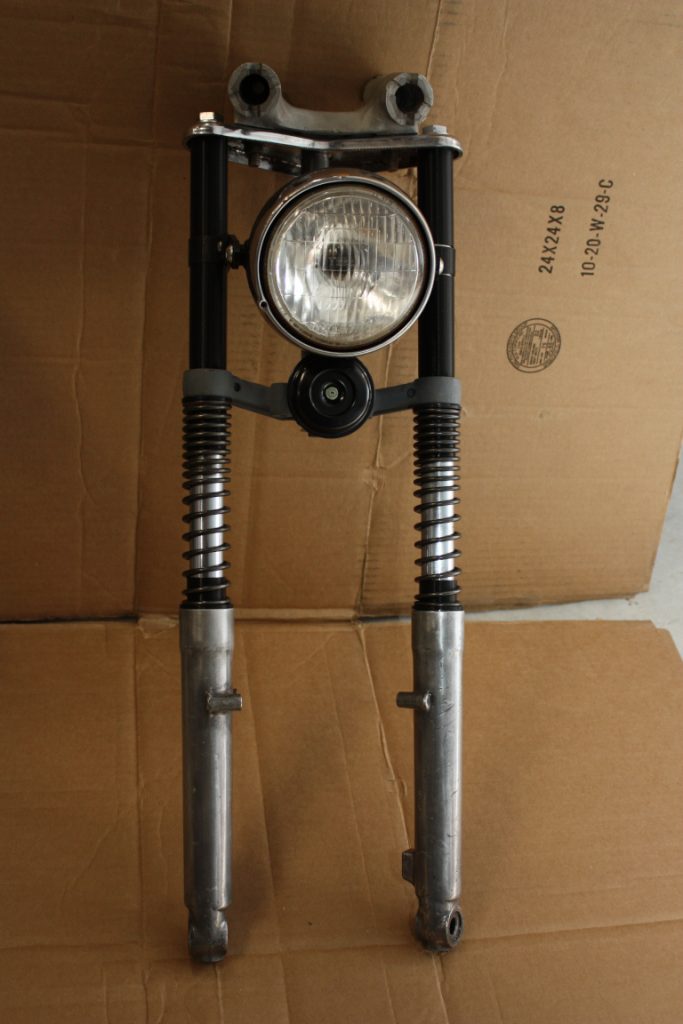
Before actually working on the seat or taillight, I had been working on the front forks. They had been apart a long time and needed reassembly, but I had thought I needed to repair the fork covers and headlight mounts, paint them, etc before messing with them. However, after seeing the results on my CT90 project, I realized it would look nice on this build as well so ditched the covers and made my own 25mm 3D printed tube covers and designed a smaller mount for the CT headlight.
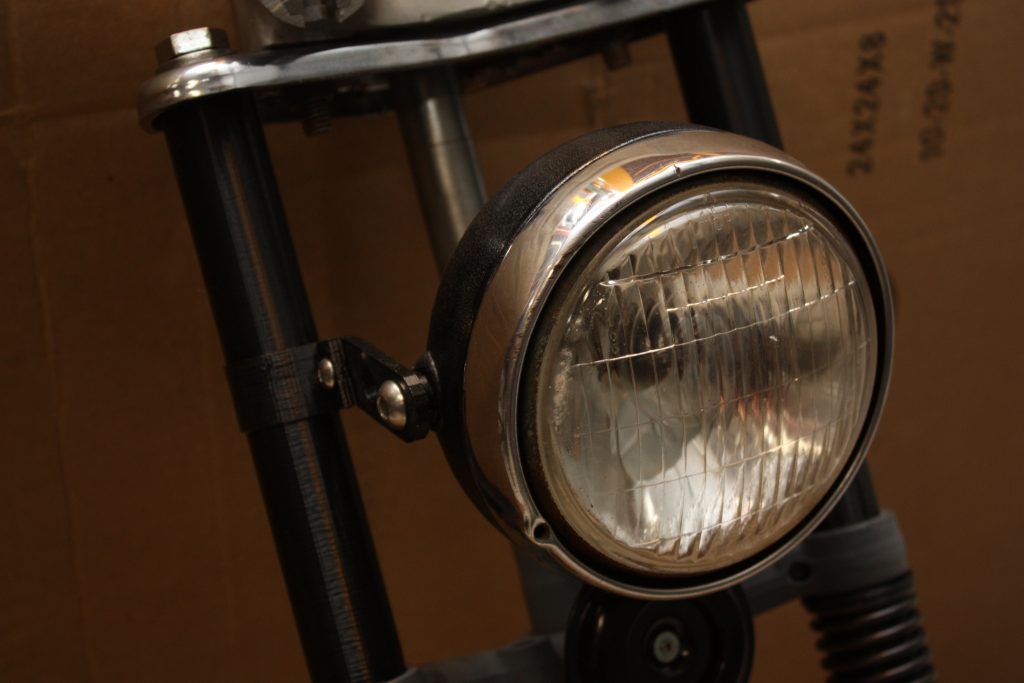
The covers hide the pitted tubes and help give it some texture and the mounts pulled the headlight back in a little tighter. The stock speedo will not work with the headlight pulled back, but no speedo is going to be on this build. Some online whine about “ugly 3D printed” part, but F ’em, I like the look myself.
The tube covers actually do more than just hide the springs on this one. The top area is fine, but the lower area had a cover that also acts as a spring mount. The spring guides were pretty worn on this old bike, so I designed and printed some new ones and also designed a spacer to fill in the blank from the top of the seal/clip to the top of the lower tube. The spring actually rides on the out section of the lower tube, but this should help to even out the overall load.
Mocked up on the bike, the forks look good to me. Along with the exposed springs on the seat, this should work well together overall.
I now need to get the rear wheel finalized and mocked together to see about setting the actual ride height. I could do that with either new shocks, or simple struts that lock in the height. With the spring seat, the struts are as bad of a deal ride wise I’d think.
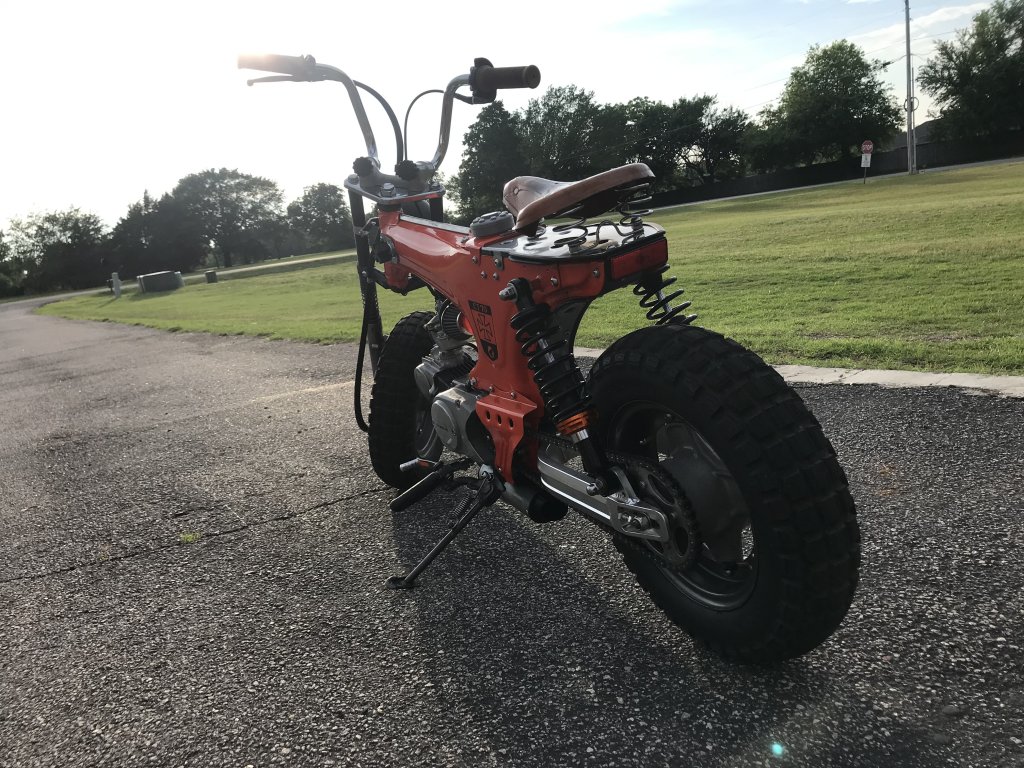
2020-12-04 Rear Shocks, Engine Case, Etc
I’m not sure I’ll like the ride height, but for now I’m setting up with stock shocks. However, I the upper spring covers were bent and rusted, like the rest of the bike, so I ditched them and will run the raw spring setup like the front. Keeps with the theme I think as well.
Also worked some metal to provide for a grommet on the right side, and a matching one for the ignition switch on the left. Have dimpled them since pics. I am still debating on rounding off the edges or using the same rubber edging like the other sheet metal will have.
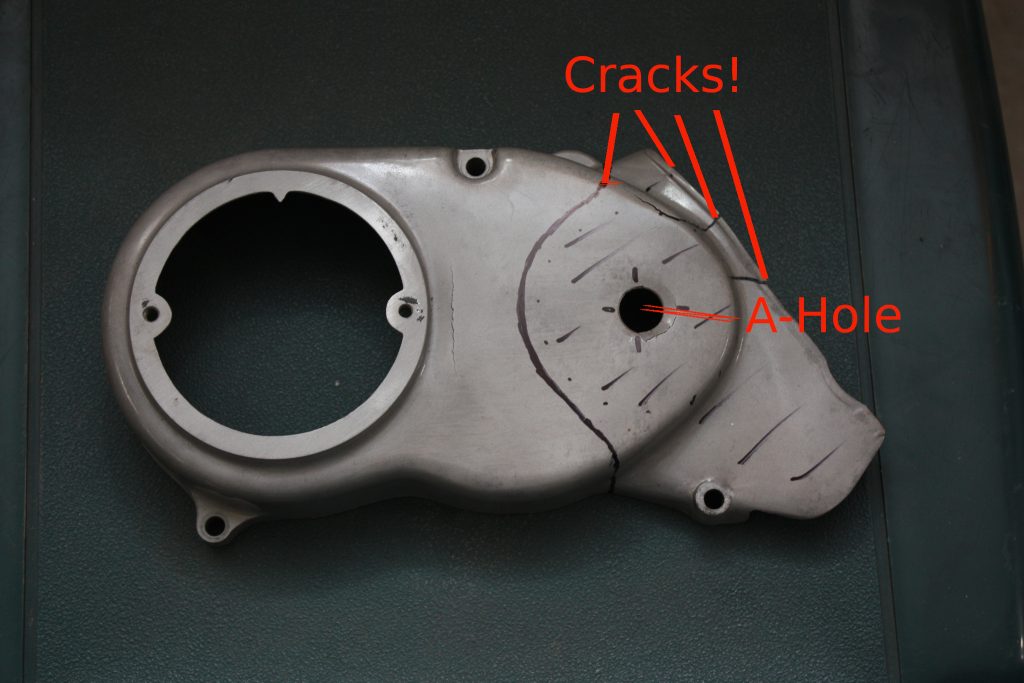
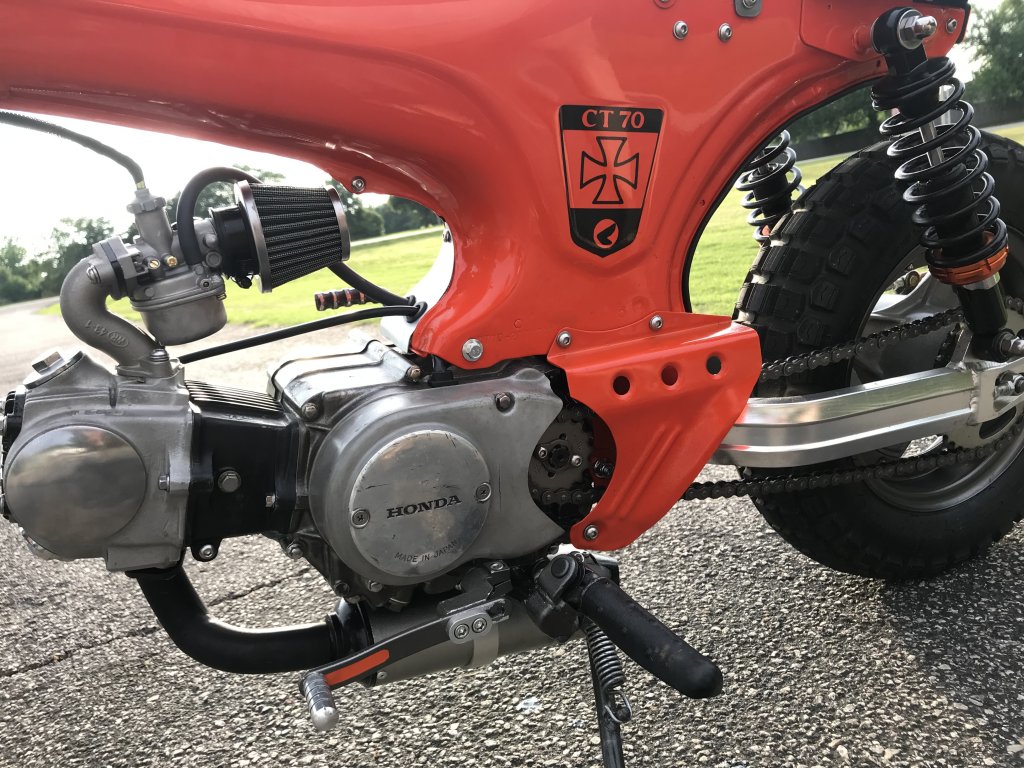
This bike was beat hard during it’s first life, and even the case shows. It is cracked, had “a-hole” in the middle, and was hard to make look nice.
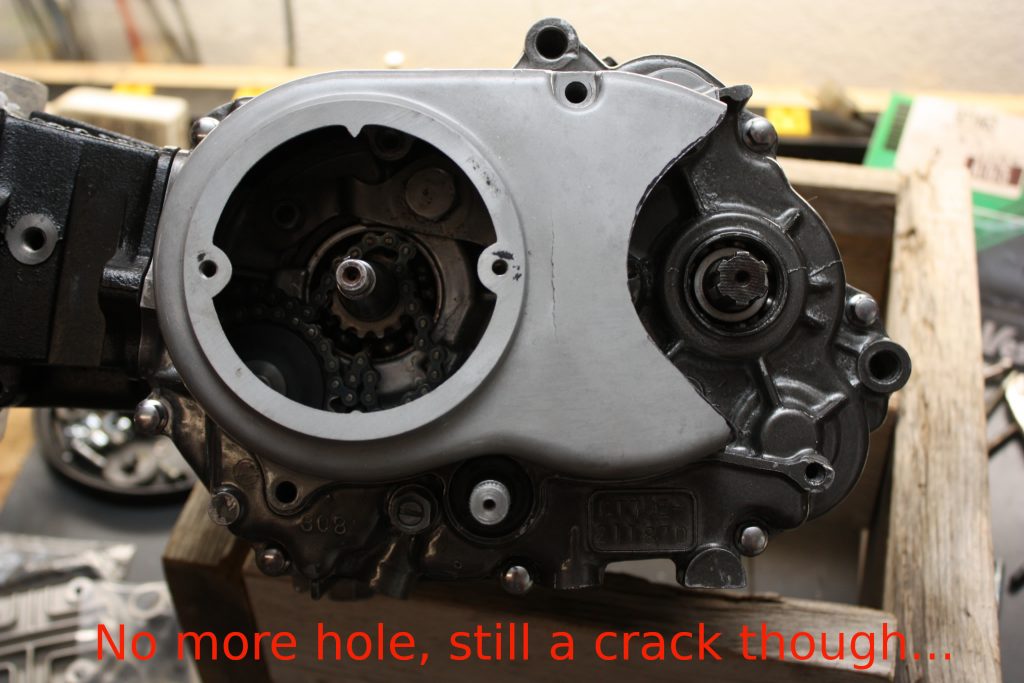
So keeping with the raw, open look, I just cut most of the junky part off. There still is a crack but nothing I can do about it there. I will likely run some sheet metal / dimple die mini change guard to keep it from eating pants or feet, but the open sprocket should look appropriate for the build.
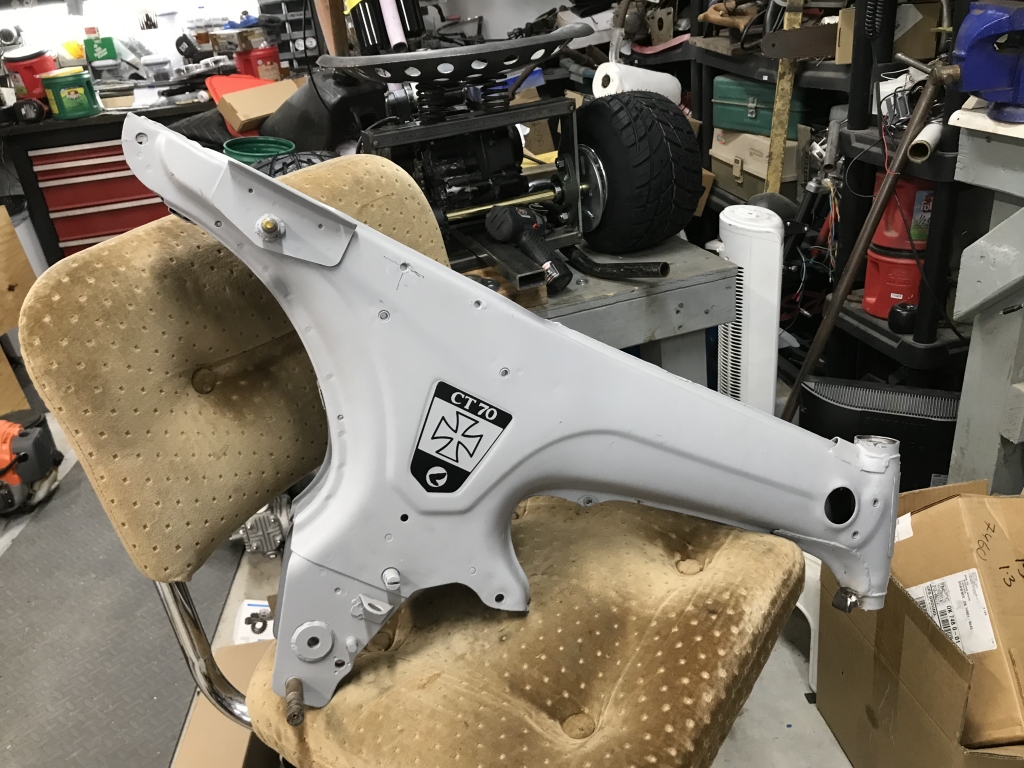
2022-08-30- Blown Apart – Ready for Paint Trip
I finally got back on this thing after looking at it forever it seems. It’s now blown apart to get off to a friend for some Competition Orange paint. That matches my ’69 Mustang, and this is a “mod” so no grief over a non standard color.
I did get some larger exhaust and low muffler setup how I wanted, mounted the engine to test things, and am pretty happy with most of it. May have some minor tweaks on assembly, but not much.
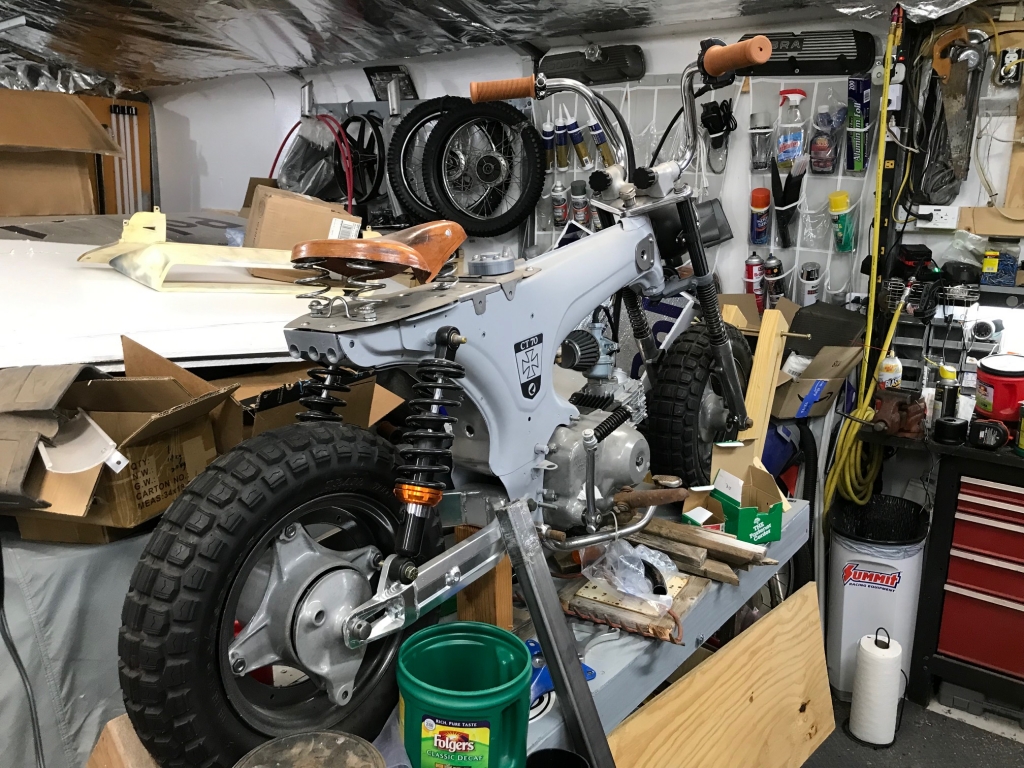
I think it will look pretty good in orange, black and silver myself.
Front View you can see the exhaust and low mount muffler.
